خرده کد جاوا اسکریپت برای ساخت بازی

saalek110

Well-Known Member
خرده کد جاوا اسکریپت برای ساخت بازی


در این تاپیک دیگه قالب ساخت بازی را نمی گیم مثل تاپیک آموزش ساخت بازی با کانواس و جاوا اسکریپت

و کاری با بازی سازها و کدهای اونها هم نداریم.


در این تاپیک ، کدهایی را میگیم که بدرد هر دو گروه بازی ساز کارها و بی بازی ساز کارها بخورد.

به نوعی این تاپیک ، هندبوک کدهای جاوا اسکریپت برای بازی سازی است.
 
آخرین ویرایش:

saalek110

Well-Known Member
خلق دو کانواس:

در قسمت html:

HTML:
<canvas id="myCanvas" width="400" height="250" style="border:1px solid grey"></canvas>
<canvas id="myCanvas2" width="400" height="100" style="border:1px solid grey"></canvas>

و در قسمت اسکریپت:

JavaScript:
const canvas = document.getElementById("myCanvas");
const ctx = canvas.getContext("2d");
    canvas.width = window.innerWidth;
     canvas.height = 270;
const canvas2 = document.getElementById("myCanvas2");
const ctx2 = canvas2.getContext("2d");
    canvas2.width = window.innerWidth;
    canvas2.height = 100;

حتما لازم نیست دوتا کانواس بسازید ، برای درک بهتر شما ، دو کانواس گذاشتم.

دقت کنید من کف اسکریپت یعنی بیرون هر تابعی کانواس ساختم. پس ctx درهر تابع برنامه قابل استفاده است.
در پست های بعدی کلمه ctx را اگر دیدید، به کدهای بالا ، اشاره می کند.
 
آخرین ویرایش:

saalek110

Well-Known Member
کد کلاس:

JavaScript:
function component(width, height, color, x, y) {
    this.width = width;
    this.height = height;
    this.x = x;
    this.y = y;
    this.update = function() {
            ctx.fillStyle = color;
            ctx.fillRect(this.x, this.y, this.width, this.height);
        
    }
}
کد بالا کلاس رسم مستطیل است.
موقع خلق شی ، همان طور که در ورودی می بینید ، عرض و طول و رنگ و x و y یعنی محل قرارگیری مستطیل داده می شود.
 

saalek110

Well-Known Member
بررسی برخورد اشیا با قهرمان داستان:
JavaScript:
for (i = 0; i < myObstacles.length; i += 1) {
      
        if (hero.crashWith(myObstacles[i])) {
heart--;
if (heart<0)
            return;
        }

در کد بالا ، اشیا در آرایه ریخته شده بوده ، و اشیا حرکت داده می شدند به سمت چپ،
یک کلاس hero شبیه کلاس مست قبل داریم که علاوه بر تابع update توابع دیگری هم دارد ، شامل تابع crashWith که در کد بالا صدا زده شده.
در ایت تابع بررسی می شود که اون شی به قهرمان برخورد کرده یا نه. و اگر برخورد کرده باشه ، true را بر می گرداند... و در کد بالا می بینید که جون بازیکن کم شده. فعلا با کدهای داخلی کد بالا کار نداریم، فقط روش ایجاد یک حلقه for برای بررسی تک تک اعضای آرایه اشیا مدنظر بوده.
 

saalek110

Well-Known Member
JavaScript:
frameNo += 1;
    if (frameNo == 1 || everyinterval(150)) {
        x = canvas.width;
  
        myObstacles.push(new component(40, 40, "red", x, 80));
}
قسمتی از کدهای تابع update را می بینیم، تابع uodate همون تابعی است که در برنامه شما مدام به فواصل زمانی مشخص اجرا می شود.

در کد بالا یک متغیر به نام فریم نامبر ، در هر اجرای تابع update یکی افزایش می یابد ، پس به عنوان ساعت بازی استفاده میشه... در کد بالا هر وقت فریم نامبر بر ۱۵۰ بخش پذیر باشد اجرا می شود ، یعنی وقتی فریم نامبر ۱۵۰ تا افزایش یافت ، یک بار کد بالا اجرا می شود. تابع evryinterval بخش پذیری حاصل تقسیم فریم نامبر بر عدد دریافتی که اینجا ۱۵۰ اسن را بررسی می کند. تابعش را بعدا می زارم.

همچنین در کد بالا , می بینید که مربع های با طول و عرض ۴۰ ساخته می شود و از سمت راست پنجره بازی با y برابر ۸۰ با کدهای بعدی که می زارم به سمت چپ راهی می شوند.رنگ مستطیل هم می بینید که قرمز است.
 

saalek110

Well-Known Member
JavaScript:
for (i = 0; i < myObstacles.length; i += 1) {
        myObstacles[i].x += -1;
        myObstacles[i].update();
    }
در کد بالا ، یک واحد به x اشیا آرایه اضافه می شود. و سپس تابع update کلاس صدا زده می شود.

در پست قبل خلق اشیا را دیدید، در دو پست قبل کلاس را دیدید ، و در این پست چگونگی حرکت دادن اشیا به سمت چم را می بینید.


اگر بازی اش را بسازیم، یک سری مربع با سایز ۴۰ در ۴۰ با y برابر با 80 به سمت چپ صفحه سرازیر هستند،
هنوز کلاس قهرمان و خلق قهرمان را کدش را نزاشیم. پس اونجا که می خواهید تابع برخورد کلاس قهرمان را صدا بزنید به خطا برخورد می کنید.
 

saalek110

Well-Known Member
JavaScript:
function hero(width, height, img, x, y) {
    this.img=img;
    this.width = width;
    this.height = height;
    this.x = x;
    this.y = y;
    this.elevation = 0;
    this.update = function() { 
  ctx.drawImage(   document.getElementById("img") ,this.x,this.y,this.width,this.height);

    }
    this.newPos = function() {
       this.y += this.elevation;
        this.hitBottom();
    }
    this.hitBottom = function() {
        var rockbottom = canvas.height - this.height-35;
        if (this.y > rockbottom) {
            this.y = rockbottom;
           this.elevation=0;
        }
    }
    this.crashWith = function(otherobj) {
        var myleft = this.x;
        var myright = this.x + (this.width);
        var mytop = this.y;
        var mybottom = this.y + (this.height);
        var otherleft = otherobj.x;
        var otherright = otherobj.x + (otherobj.width);
        var othertop = otherobj.y;
        var otherbottom = otherobj.y + (otherobj.height);
        var crash = true;
        if ((mybottom < othertop) || (mytop > otherbottom) || (myright < otherleft) || (myleft > otherright)) {
            crash = false;
        }
        return crash;
    }
}
کلاس hero یا قهرمان را در کد بالا داریم. به جای رنگ ، img را به کلاس می دهد ، و کلاس یک عکس را نمایش می دهد.
تابع برخورد را هم در کد بالا می بینیم.
 
آخرین ویرایش:

saalek110

Well-Known Member
متغیرهای اول برنامه :
JavaScript:
var hero;
var myObstacles = [];
let heart=1000;
کدهای بالا در منطقه جاوا اسکریپت یعنی بعد تگ script بیرون هر تابعی نوشته میشه.

متغیر hero برای ساخت قهرمان است و اون آرایه هم برای ساخت اشیا است که مربع ها بودند.
متغیر heart هم جون بازیکن است.

ساخت هرو:
JavaScript:
hero = new hero(2, 2, "img1", 10, 120 );

اون img1 از کدی که آدرس عکس را در قسمت html با id برابر با img1 تعیین می کند حاصل میشه.

در کد html زیر ، عکسی با نام plane با id برابر با img1 مشخص شده... و در بالا دیدید هرو چطور img1 را ارسال کرد به کلاس برای خلق خود.

HTML:
<img id="img1" src="images/plane.png" alt="plane" width="10" height="10">
 
آخرین ویرایش:

saalek110

Well-Known Member
HTML:
<body onload="start()">

اونهایی که از بازی ساز استفاده نمی کنند با کد بالا ، تابعی به نام start را اول برنامه وادار به اجرا می توانند بکنند.
هرو را در تابع استارت میشه خلق کرد. و کلا هر کد جاوا اسکریپت که قبل شروع چرخش تابع update می خواهید اجرا بشه را می توانید در تابع start قرار دهید. ولی اگر با بازی ساز کار می کنید خودش توابعی برای این کارها تعیین کرده.
 

saalek110

Well-Known Member
پاک کردن صفحه هم در تابع update انجام میشه... البته در اونهایی که بی بازی ساز کار می کنند.
من خودن به جای پاک کردن صفحه ، کل صفحه را با رنگ خاصی رنگ می کنم.
و بعدا یک آسمان و زمین قبل رسم بقیه چیزها رسم می کردم.

JavaScript:
    ctx.fillStyle = "#ccaaaa"; 
   ctx.fillRect( 0, 0, canvas.width, canvas.height);
 
آخرین ویرایش:

saalek110

Well-Known Member
رسم و تغییر مکان هرو:
JavaScript:
hero.newPos();
hero.update();

دو خط کد بالا ، دو تابع کلاس قهرمان را صدا می زنند تا تغییر مکان و رسمش انجام شود.
کدهای بالا ، در اونهایی که بی بازی ساز کا می کنند در تابع update قرار می گیرد.
 

saalek110

Well-Known Member
چاپ در قسمت html:

JavaScript:
document.getElementById("the_heart").innerHTML="heart= " + JSON.stringify(heart);

کد بالا جون را نشان می دهد.

در قسمت html باید این را بزارید:
HTML:
<p id="the_heart"></p>
 

saalek110

Well-Known Member
تابع تقسیم و یافتن باقی مانده:

JavaScript:
function everyinterval(n) {
    if ((myGameArea.frameNo / n) % 1 == 0) {return true;}
    return false;
}
در کدهای پستهای قبل دیدید که خلق اشیا با فواصلی بود و با کمک تابع everyinterval بخش پذیری فریم نامبر بر عددی را بررسی می کرد.
 

saalek110

Well-Known Member
تابع ارتباط با دکمه ها:

JavaScript:
function accelerate(n) {
    hero.elevation = n;
 
}

HTML:
<center>

<button type="button" style=" font-size:35px; height:100px; width:220px" onclick="accelerate(-1)">up</button>


<button type="button" style=" font-size:12px; height:55px; width:120px" onclick="accelerate(0)">stop</button>


<button type="button" style=" font-size:35px; height:100px; width:220px" onclick="accelerate(1)">down</button>
</center>

دکمه های فوق با اون تابع که در اول این پست کدش را زدیم ارتباط برقرار می کنه.

کد تابع بالا ، برای بازی هواپیما بوده که بالا و پایین می رفته.
 

saalek110

Well-Known Member
CSS:
#the_heart {
    border:3px solid #fff733;
    border-radius:25px;

font-size:20px;

    margin-right:150px;
    margin-left:150px;

    padding-top:3px;
    padding-bottom:3px;

    padding-left:30px;

    background-color:rgba(250,130,30,1);
       }

کد بالا هم برای css نماش جون است.


نمایش امتیاز یا هر چیز دیگر روی صفحه:


JavaScript:
text="SCORE: " + frameNo;

           ctx.font = "20px" + " "+"Consolas" ;

            ctx.fillStyle = "black";

           ctx.fillText(text, 240, 30);
 
آخرین ویرایش:

saalek110

Well-Known Member
کل کدهای بالا:

کل تکه کدهای بالا را در برنامه زیر مونتاژ کردم تا کارکرد اون را هم ببینید.
جایگاه قرار گیری هر کد را در زیر می بینید.
توابع استارت و update در کنار کلاس اشیا و کلاس hero....هم طراز هم قرار گرفته اند.
تعریف کانواس و تعریف متغیرها بیرون توابع است.
کد فعال کردن دوره ای تابع update هم کف اسکرسپت بیرون هر تابعی است.


بهتر است کلاس اشیا و کلاس قهرمان و تابع update هر یک در فایلی جدا قرار داشته باشد.
و کارهایی که در تابع update انجام می شود هم در یک فایل جدا باشد و در تابع update اون فایلها فراخوانی شود.

JavaScript:
<html>
<head>
<meta name="viewport" content="width=device-width, initial-scale=1.0"/>

<style>

body {background-color: #88aa78;}
#up_down1 {
    width:80%
    height:80%;
}


#the_heart {
    border:3px solid #fff733;
    border-radius:25px;

font-size:20px;

    margin-right:150px;
    margin-left:150px;

    padding-top:3px;
    padding-bottom:3px;

    padding-left:30px;

    background-color:rgba(250,130,30,1);
       }
 
</style>
</head>

<body onload="startGame()">


<canvas id="myCanvas" width="400" height="250" style="border:1px solid grey"></canvas>


<img id="img" src="../images/plane.png" alt="plane" width="30" height="10">

 <script type='text/javascript'>
 
 
 var hero;
var myObstacles = [];
let heart=1000;
 var frameNo=0;
 

const canvas = document.getElementById("myCanvas");
const ctx = canvas.getContext("2d");
     canvas.width = window.innerWidth;
     canvas.height = 270;

 
var FPS = 50;
setInterval(function(){
   update();
}, 1000/FPS);


function startGame() {

     hero = new hero(73, 25 ,"img1", 10,200);
}


function component(width, height, color, x, y) {
    this.width = width;
    this.height = height;
    this.x = x;
    this.y = y;
    this.update = function() {
            ctx.fillStyle = color;
            ctx.fillRect(this.x, this.y, this.width, this.height);
 
    }
}  // component

// ---------- hero class --------------
function hero(width, height, img, x, y) {
    this.img=img;
    this.width = width;
    this.height = height;
    this.x = x;
    this.y = y;
    this.elevation = 0;
    this.update = function() {
  ctx.drawImage(   document.getElementById("img") ,this.x,this.y,this.width,this.height);

    }
    this.newPos = function() {
       this.y += this.elevation;
        this.hitBottom();
    }
    this.hitBottom = function() {
        var rockbottom = canvas.height - this.height-35;
        if (this.y > rockbottom) {
            this.y = rockbottom;
           this.elevation=0;
        }
    }
    this.crashWith = function(otherobj) {
        var myleft = this.x;
        var myright = this.x + (this.width);
        var mytop = this.y;
        var mybottom = this.y + (this.height);
        var otherleft = otherobj.x;
        var otherright = otherobj.x + (otherobj.width);
        var othertop = otherobj.y;
        var otherbottom = otherobj.y + (otherobj.height);
        var crash = true;
        if ((mybottom < othertop) || (mytop > otherbottom) || (myright < otherleft) || (myleft > otherright)) {
            crash = false;
        }
        return crash;
    }
}   // hero class

// ========================================
//  ------- update function --------------
function update()
{
 
    for (i = 0; i < myObstacles.length; i += 1) {
 
        if (hero.crashWith(myObstacles[i])) {
heart--;
if (heart<0)
            return;
        }// if
    } // for
 
    frameNo += 1;
 
    ctx.fillStyle = "#ccaaaa"; // rang kardane safeh
   ctx.fillRect( 0, 0, canvas.width, canvas.height);
 
    if (frameNo == 1 || everyinterval(150)) {
        x = canvas.width;
        myObstacles.push(new component(40, 40, "red", x, 80));
}   // if frameno 150

for (i = 0; i < myObstacles.length; i += 1) {
        myObstacles[i].x += -1;
        myObstacles[i].update();
    }// for loop for move objects


hero.newPos();
hero.update();

document.getElementById("the_heart").innerHTML="heart= " + JSON.stringify(heart);


text="SCORE: " + frameNo;
           ctx.font = "20px" + " "+"Consolas" ;
            ctx.fillStyle = "black";
           ctx.fillText(text, 240, 30);
}// uodate function

function everyinterval(n) {
    if ((frameNo / n) % 1 == 0) {return true;}
    return false;
}

function accelerate(n) {
    hero.elevation = n;
}    //accelerate

</script>
<center>

<table><tr><td>
<button type="button" id="up_down1" style=" font-size:20px;  " onclick="accelerate(-1)">up</button>
<button type="button" id="middle"  style=" font-size:12px;   " onclick="accelerate(0)">stop</button>
<button type="button" id="up_down2" style=" font-size:20px;  " onclick="accelerate(1)">down</button>
</td></tr><tr><td>
</td></tr>
</table>
</center>

<script>
   document.getElementById('up_down1').style.width =  window.innerWidth/ 3;
  document.getElementById('up_down1').style.height =  window.innerHeight/ 8;
   document.getElementById('up_down2').style.width =  window.innerWidth/ 3;
   document.getElementById('up_down2').style.height =  window.innerHeight/ 8;
   document.getElementById('middle').style.width =  window.innerWidth/ 5;
   document.getElementById('middle').style.height =  window.innerHeight/ 10;
</script>
<p id="the_heart"></p>
<p>Use the up and down button to stay in the air</p>
<p>Good luck!</p>

</body>                                   
</html>

لینک بازی:

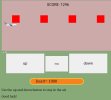
عکس بازی:

Screenshot_۲۰۲۴-۰۳-۰۹_۲۱۵۸۰۱.jpg
 
آخرین ویرایش:

saalek110

Well-Known Member
JavaScript:
  ctx.font = "48px serif";
  ctx.fillText("Hello world", 10, 50);

JavaScript:
ctx.font = "48px serif";
  ctx.strokeText("Hello world", 10, 50);


در بالا دو روش نوشتن متن را می بینید.

تعیین رنگ به روشهای مختلف:
JavaScript:
ctx.fillStyle = "orange";
ctx.fillStyle = "#FFA500";
ctx.fillStyle = "rgb(255 165 0)";
ctx.fillStyle = "rgb(255 165 0 / 100%)";
 

saalek110

Well-Known Member
پترن:
JavaScript:
function draw() {
  const ctx = document.getElementById("canvas").getContext("2d");

  // create new image object to use as pattern
  const img = new Image();
  img.src = "canvas_createpattern.png";
  img.onload = () => {
    // create pattern
    const ptrn = ctx.createPattern(img, "repeat");
    ctx.fillStyle = ptrn;
    ctx.fillRect(0, 0, 150, 150);
  };
}


از یک منبع دیگر این طوری داریم:

JavaScript:
[CODE=javascript]window.onload = () => {

    let canvas = document.querySelector('canvas')

    let context = canvas.getContext('2d')


    let patternImage = new Image();

    patternImage.src = "assets/img/apple.png";


    patternImage.onload = () => {

        let pattern = context.createPattern(patternImage, 'repeat');

        context.fillStyle = pattern;

        context.fillRect(0, 0, 900, 400);

    }


}
[/CODE]

من هیج کدام را تست نکردم.
 
آخرین ویرایش:

saalek110

Well-Known Member
کد زیر شاید برای وسط قرار دادن پنجره کانواس باشد:
JavaScript:
  // Center main canvas area to the middle of the screen
  ctx.translate(
    (window.innerWidth - canvasWidth) / 2 - sceneOffset,
    (window.innerHeight - canvasHeight) / 2
  );
 

جدیدترین ارسال ها

بالا