unnamed.h
کاربر متخصص Zbrush
Making of Flemish Dude

Hi guys . i made this character for my portfolio and it was a lots of new things that i learned during the time of making him and i'll be glad to share it with you guys 
A few notes about this "Making of"
at first i have to say all that i'm showing you here is my own opinion and experience ,so if something is wrong just go easy on it .
and the second thing is , actually i'm not gonna go over basic stuff in modeling, but i'm gonna explain ways and tricks that i used to make this chatacter.
Concept
Concept was from book called "arms and armor " , and a lots of pictures from internet .
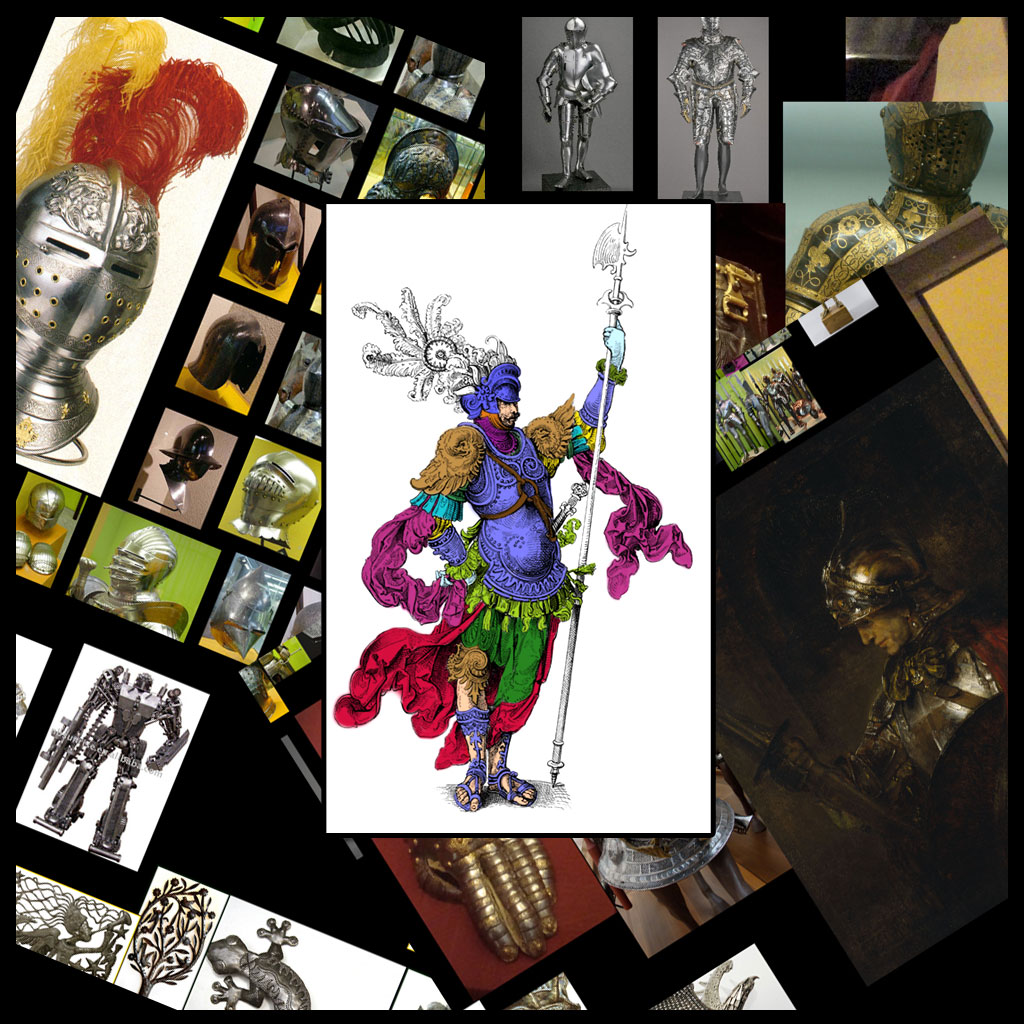
And for fabric actually i used book called "Burne Hogarth Dynamic Wrinkles And Drapery" it's a really good book and i totally recommend it ,and again a lots of pictures from internet .
[MIUC]P1268336403[/MIUC]
Start
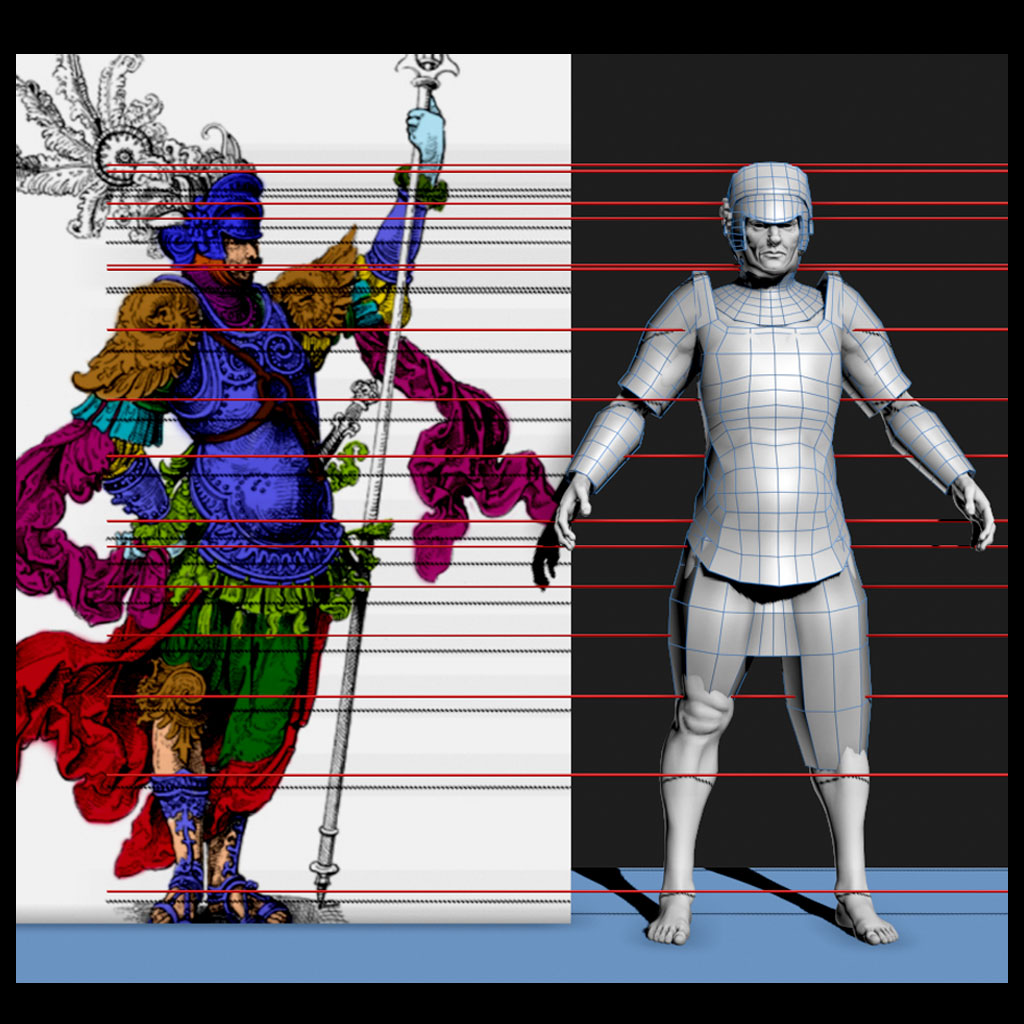
Always you have to understand and imagine the whole thing in 3d before you go and start to model it ,what i did for understanding my concept was to sketch on him ,and really tried to understand every piece of it ,

Modeling
My pipeline to start model a character like this, is pretty much usual .
i made a really really low poly of character in 3ds max , what i had in mind the
whole prosses was to make a good balance and size of every piece .
i made a really really low poly of character in 3ds max , what i had in mind the
whole prosses was to make a good balance and size of every piece .
As soon as i had the lowpoly i jumped in zbrush and started to test some detaling .
Detailing in zbrush
For now let me show you how i did detail on armors and then we gonna go over cloth and other stuff.
Secret for making details like that was LAYERS , let me show you what i mean by that
Secret for making details like that was LAYERS , let me show you what i mean by that
[MIUC]P1268336820[/MIUC]
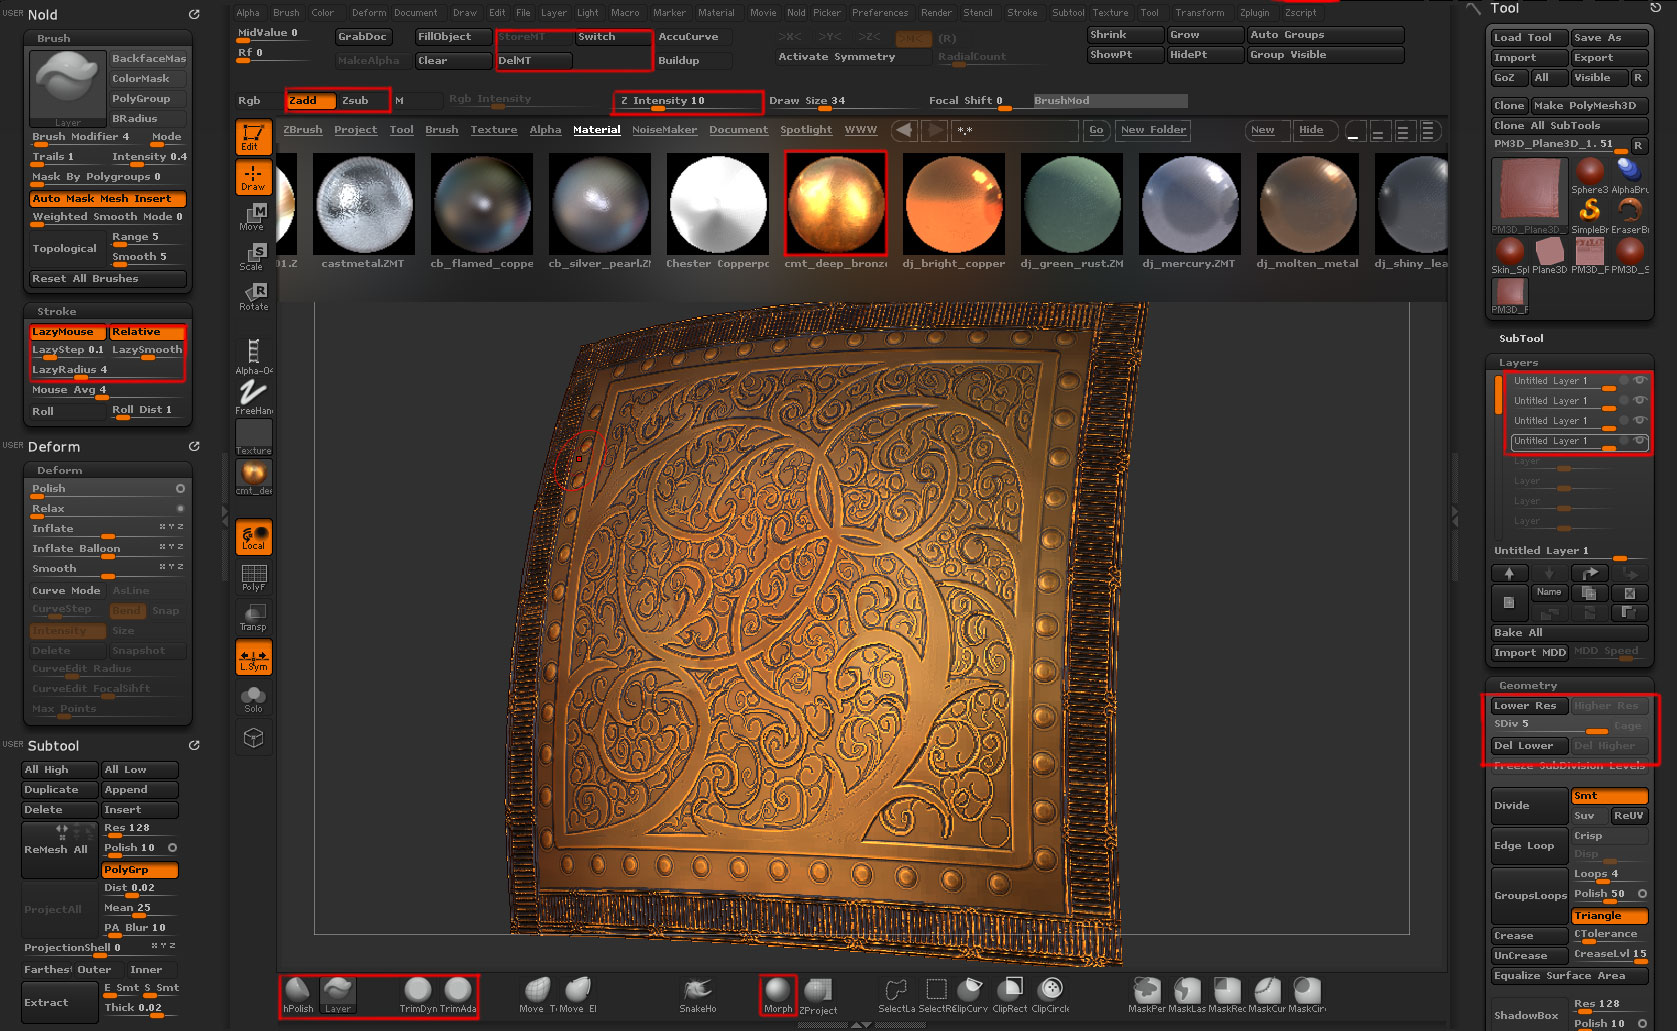
Here's the step by step explanations:
First you need a lot of polygons of course for this kind of detailing , couple of millions of polygons should work fine .
Always start a new layer for every kind of details for example for pattern one layer for lion in my case one layer .
I used layer brush for this particular details and in order to make layer brush work perfectly you need to store morph target and choose your desire Zintensity and of course with lazy mouth on .
We ready to detailing , my pipeline for this kind of detail was start with big Lines and give them some complexity and then use negative value (Zsub) to make it look even more complex .
And last part is cleaning them up with brushes like trim dynamic and adabtive and of course Hpolish brush and morph brush .
For other parts like eagle and lion actually i just sculpt them using claybuild up for making shapes and then again cleaned them up with trim and polish brushes .[note : these are not the only brushes that has been used , i use any brush if it needs to, like move , standard ,smooth and smooth directional , demistandard , pinch , flatten , inflate brushes and so on].
[MIUC]P1268336884[/MIUC]
For me the key to sculpt cloth was to use standard brush with accucurve activeated and tailes like 5 to 15 and last thing with lazy mouth on around 30 .
[MIUC]P1268336915[/MIUC]
I used transpose master for make big changes , move brush for little ones , and pretty much just with standard brush added detail and smooth them up with smooth directional , to use smoth directional you have to move your brush in direct of the wrinkle that you sculpted or just go to brush menu in modifire subpalette and play with smooth parameter to get what you want . you can also use move tool with Accucurve activated to move wrinkles around
and make fabric look more realastic .
and make fabric look more realastic .
[MIUC]P1268336949[/MIUC]
UV and Texture
Uv and texture both were done in zbrush too , for uv i used uv master witch is extremely powerfull in my opinion, and for texture i just used ploy painting and mask by cavity with different intensity , and after making couple of textures in Zbrush , i mixed them up and tweaked them later in photoshop and
of course added some additional textures .
of course added some additional textures .
[MIUC]P1268336978[/MIUC]
Render
I used highpoly meshes for render , you know i can just topology them and bring them back in zbrush and start to extract normal and displacement map but as long as i am not using this model for any purpose i decided to not to do that and save time , so i exported them and rendered ,using v-ray ,and because of memory limit, i made v-ray proxy for all of the pieces separately. lighting and materials was pretty much simple and there is nothing special about them .
[MIUC]P1268337004[/MIUC]
[MIUC]P1268337033[/MIUC]
And at last quick tweak and adjustment in photoshop ,for background i thought if i leave it as black viewers will just concentrate on character witch was a bad idea , here is last result i added some background for purpose of
this making of, and i hope you like it .
this making of, and i hope you like it .
[MIUC]P1268337063[/MIUC]
Feel free to ask any question .